[{"CategoryType":0,"ParentID":6697,"Id":6698,"Name":"Main Documentation","FriendlyName":"main-documentation","Level":0,"Children":4,"Link":null,"Destination":null,"PostFile":null},{"CategoryType":0,"ParentID":6698,"Id":6701,"Name":"Getting Started","FriendlyName":"getting-started","Level":1,"Children":2,"Link":null,"Destination":null,"PostFile":null},{"CategoryType":0,"ParentID":6701,"Id":6705,"Name":"About Koolay","FriendlyName":"about-koolay","Level":2,"Children":0,"Link":null,"Destination":null,"PostFile":null},{"CategoryType":0,"ParentID":6701,"Id":6706,"Name":"Koolay Subscriptions","FriendlyName":"koolay-subscriptions","Level":2,"Children":0,"Link":null,"Destination":null,"PostFile":null},{"CategoryType":0,"ParentID":6698,"Id":23536,"Name":"New User Onboarding Guide","FriendlyName":"new-user-onboarding-guide","Level":1,"Children":0,"Link":null,"Destination":null,"PostFile":null},{"CategoryType":0,"ParentID":6698,"Id":6886,"Name":"How to manage Modules","FriendlyName":"how-to-manage-modules","Level":1,"Children":22,"Link":null,"Destination":null,"PostFile":null},{"CategoryType":0,"ParentID":6886,"Id":24439,"Name":"Account Module","FriendlyName":"account-module","Level":2,"Children":0,"Link":null,"Destination":null,"PostFile":null},{"CategoryType":0,"ParentID":6886,"Id":6889,"Name":"Category Module","FriendlyName":"category-module","Level":2,"Children":0,"Link":null,"Destination":null,"PostFile":null},{"CategoryType":0,"ParentID":6886,"Id":6888,"Name":"Content Module","FriendlyName":"content-module","Level":2,"Children":0,"Link":null,"Destination":null,"PostFile":null},{"CategoryType":0,"ParentID":6886,"Id":6893,"Name":"Gallery Module","FriendlyName":"gallery-module","Level":2,"Children":0,"Link":null,"Destination":null,"PostFile":null},{"CategoryType":0,"ParentID":6886,"Id":6890,"Name":"Banner Module","FriendlyName":"banner-module","Level":2,"Children":0,"Link":null,"Destination":null,"PostFile":null},{"CategoryType":0,"ParentID":6886,"Id":6894,"Name":"Popup Module","FriendlyName":"popup-module","Level":2,"Children":0,"Link":null,"Destination":null,"PostFile":null},{"CategoryType":0,"ParentID":6886,"Id":6895,"Name":"Survey Module","FriendlyName":"survey-module","Level":2,"Children":0,"Link":null,"Destination":null,"PostFile":null},{"CategoryType":0,"ParentID":6886,"Id":6896,"Name":"Events Module","FriendlyName":"events-module","Level":2,"Children":0,"Link":null,"Destination":null,"PostFile":null},{"CategoryType":0,"ParentID":6886,"Id":6897,"Name":"Members Module","FriendlyName":"members-module","Level":2,"Children":0,"Link":null,"Destination":null,"PostFile":null},{"CategoryType":0,"ParentID":6886,"Id":44524,"Name":"E-Guide Module","FriendlyName":"e-guide-module","Level":2,"Children":0,"Link":null,"Destination":null,"PostFile":null},{"CategoryType":0,"ParentID":6886,"Id":6898,"Name":"Staff Module","FriendlyName":"staff-module","Level":2,"Children":0,"Link":null,"Destination":null,"PostFile":null},{"CategoryType":0,"ParentID":6886,"Id":6899,"Name":"Bulletin Module","FriendlyName":"bulletin-module","Level":2,"Children":0,"Link":null,"Destination":null,"PostFile":null},{"CategoryType":0,"ParentID":6886,"Id":6900,"Name":"Email List Module","FriendlyName":"email-list-module","Level":2,"Children":0,"Link":null,"Destination":null,"PostFile":null},{"CategoryType":0,"ParentID":6886,"Id":6901,"Name":"Forms Module","FriendlyName":"forms-module","Level":2,"Children":3,"Link":null,"Destination":null,"PostFile":null},{"CategoryType":0,"ParentID":6901,"Id":24969,"Name":"Beginning","FriendlyName":"beginning","Level":3,"Children":0,"Link":null,"Destination":null,"PostFile":null},{"CategoryType":0,"ParentID":6901,"Id":24820,"Name":"Forms","FriendlyName":"forms","Level":3,"Children":0,"Link":null,"Destination":null,"PostFile":null},{"CategoryType":0,"ParentID":6901,"Id":24821,"Name":"Applications","FriendlyName":"applications","Level":3,"Children":0,"Link":null,"Destination":null,"PostFile":null},{"CategoryType":0,"ParentID":6886,"Id":6902,"Name":"AI Settings Module","FriendlyName":"ai-settings-module","Level":2,"Children":0,"Link":null,"Destination":null,"PostFile":null},{"CategoryType":0,"ParentID":6886,"Id":6903,"Name":"Security Module","FriendlyName":"security-module","Level":2,"Children":0,"Link":null,"Destination":null,"PostFile":null},{"CategoryType":0,"ParentID":6886,"Id":6904,"Name":"Tools Module","FriendlyName":"tools-module","Level":2,"Children":3,"Link":null,"Destination":null,"PostFile":null},{"CategoryType":0,"ParentID":6904,"Id":14431,"Name":"Image Editor","FriendlyName":"image-editor","Level":3,"Children":0,"Link":null,"Destination":null,"PostFile":null},{"CategoryType":0,"ParentID":6904,"Id":14432,"Name":"Code Editor","FriendlyName":"code-editor","Level":3,"Children":0,"Link":null,"Destination":null,"PostFile":null},{"CategoryType":0,"ParentID":6904,"Id":14433,"Name":"File Manager","FriendlyName":"file-manager","Level":3,"Children":0,"Link":null,"Destination":null,"PostFile":null},{"CategoryType":0,"ParentID":6886,"Id":6905,"Name":"Settings Module","FriendlyName":"settings-module","Level":2,"Children":7,"Link":null,"Destination":null,"PostFile":null},{"CategoryType":0,"ParentID":6905,"Id":25415,"Name":"Beginning","FriendlyName":"beginning","Level":3,"Children":0,"Link":null,"Destination":null,"PostFile":null},{"CategoryType":0,"ParentID":6905,"Id":25416,"Name":"Site Configurations","FriendlyName":"site-configurations","Level":3,"Children":0,"Link":null,"Destination":null,"PostFile":null},{"CategoryType":0,"ParentID":6905,"Id":25417,"Name":"System Settings","FriendlyName":"system-settings","Level":3,"Children":0,"Link":null,"Destination":null,"PostFile":null},{"CategoryType":0,"ParentID":6905,"Id":25418,"Name":"Event Log","FriendlyName":"event-log","Level":3,"Children":0,"Link":null,"Destination":null,"PostFile":null},{"CategoryType":0,"ParentID":6905,"Id":25419,"Name":"HomePage Settings","FriendlyName":"homepage-settings","Level":3,"Children":0,"Link":null,"Destination":null,"PostFile":null},{"CategoryType":0,"ParentID":6905,"Id":25420,"Name":"Customer Language","FriendlyName":"customer-language","Level":3,"Children":0,"Link":null,"Destination":null,"PostFile":null},{"CategoryType":0,"ParentID":6905,"Id":25422,"Name":"Site Constants","FriendlyName":"site-constants","Level":3,"Children":0,"Link":null,"Destination":null,"PostFile":null},{"CategoryType":0,"ParentID":6886,"Id":31648,"Name":"Community Module","FriendlyName":"community-module","Level":2,"Children":0,"Link":null,"Destination":null,"PostFile":null},{"CategoryType":0,"ParentID":6886,"Id":28629,"Name":"Feature Track Module","FriendlyName":"feature-track-module","Level":2,"Children":0,"Link":null,"Destination":null,"PostFile":null},{"CategoryType":0,"ParentID":6886,"Id":31647,"Name":"Blog Module","FriendlyName":"blog-module","Level":2,"Children":0,"Link":null,"Destination":null,"PostFile":null},{"CategoryType":0,"ParentID":6886,"Id":35746,"Name":"Social Media Posting Module","FriendlyName":"social-media-posting-module","Level":2,"Children":0,"Link":null,"Destination":null,"PostFile":null},{"CategoryType":0,"ParentID":6698,"Id":6891,"Name":"Questions \u0026amp; Answers","FriendlyName":"questions-answers","Level":1,"Children":14,"Link":null,"Destination":null,"PostFile":null},{"CategoryType":0,"ParentID":6891,"Id":20480,"Name":"Koolay Console","FriendlyName":"koolay-console","Level":2,"Children":0,"Link":null,"Destination":null,"PostFile":null},{"CategoryType":0,"ParentID":6891,"Id":20481,"Name":"Category Module","FriendlyName":"category","Level":2,"Children":0,"Link":null,"Destination":null,"PostFile":null},{"CategoryType":0,"ParentID":6891,"Id":20482,"Name":"Content Module","FriendlyName":"content","Level":2,"Children":0,"Link":null,"Destination":null,"PostFile":null},{"CategoryType":0,"ParentID":6891,"Id":20483,"Name":"Gallery Module","FriendlyName":"gallery","Level":2,"Children":0,"Link":null,"Destination":null,"PostFile":null},{"CategoryType":0,"ParentID":6891,"Id":20484,"Name":"Banner Module","FriendlyName":"banner","Level":2,"Children":0,"Link":null,"Destination":null,"PostFile":null},{"CategoryType":0,"ParentID":6891,"Id":20485,"Name":"Pop-up Module","FriendlyName":"pop-up","Level":2,"Children":0,"Link":null,"Destination":null,"PostFile":null},{"CategoryType":0,"ParentID":6891,"Id":20486,"Name":"Events Module","FriendlyName":"events","Level":2,"Children":0,"Link":null,"Destination":null,"PostFile":null},{"CategoryType":0,"ParentID":6891,"Id":20487,"Name":"Staff Module","FriendlyName":"staff","Level":2,"Children":0,"Link":null,"Destination":null,"PostFile":null},{"CategoryType":0,"ParentID":6891,"Id":20488,"Name":"Members Module","FriendlyName":"members","Level":2,"Children":0,"Link":null,"Destination":null,"PostFile":null},{"CategoryType":0,"ParentID":6891,"Id":20489,"Name":"Forms Module","FriendlyName":"forms","Level":2,"Children":0,"Link":null,"Destination":null,"PostFile":null},{"CategoryType":0,"ParentID":6891,"Id":20490,"Name":"Account Module","FriendlyName":"account","Level":2,"Children":0,"Link":null,"Destination":null,"PostFile":null},{"CategoryType":0,"ParentID":6891,"Id":20491,"Name":"Security Module","FriendlyName":"security","Level":2,"Children":0,"Link":null,"Destination":null,"PostFile":null},{"CategoryType":0,"ParentID":6891,"Id":20492,"Name":"Tools Module","FriendlyName":"tools","Level":2,"Children":0,"Link":null,"Destination":null,"PostFile":null},{"CategoryType":0,"ParentID":6891,"Id":20493,"Name":"Settings Module","FriendlyName":"settings","Level":2,"Children":0,"Link":null,"Destination":null,"PostFile":null},{"CategoryType":0,"ParentID":6697,"Id":6699,"Name":"Guides","FriendlyName":"guides","Level":0,"Children":1,"Link":null,"Destination":null,"PostFile":null},{"CategoryType":0,"ParentID":6699,"Id":6703,"Name":"Guides","FriendlyName":"guides","Level":1,"Children":1,"Link":null,"Destination":null,"PostFile":null},{"CategoryType":0,"ParentID":6703,"Id":6708,"Name":"Choosing the Right Subscription Plan","FriendlyName":"choosing-the-right-subscription-plan","Level":2,"Children":0,"Link":null,"Destination":null,"PostFile":null},{"CategoryType":0,"ParentID":6697,"Id":6700,"Name":"FAQ","FriendlyName":"faq","Level":0,"Children":1,"Link":null,"Destination":null,"PostFile":null},{"CategoryType":0,"ParentID":6700,"Id":6704,"Name":"FAQ","FriendlyName":"faq","Level":1,"Children":2,"Link":null,"Destination":null,"PostFile":null},{"CategoryType":0,"ParentID":6704,"Id":6710,"Name":"GENERAL","FriendlyName":"general","Level":2,"Children":0,"Link":null,"Destination":null,"PostFile":null},{"CategoryType":0,"ParentID":6704,"Id":6711,"Name":"Licensing","FriendlyName":"licensing","Level":2,"Children":0,"Link":null,"Destination":null,"PostFile":null},{"CategoryType":0,"ParentID":6697,"Id":6793,"Name":"Support","FriendlyName":"support","Level":0,"Children":3,"Link":"https://support.koolay.com","Destination":null,"PostFile":null},{"CategoryType":0,"ParentID":6793,"Id":6794,"Name":"Professional Support","FriendlyName":"professional-support","Level":1,"Children":0,"Link":null,"Destination":null,"PostFile":null},{"CategoryType":0,"ParentID":6793,"Id":6796,"Name":"Release Notes","FriendlyName":"release-notes","Level":1,"Children":0,"Link":null,"Destination":null,"PostFile":null},{"CategoryType":0,"ParentID":6793,"Id":6795,"Name":"Sending a Feedback","FriendlyName":"sending-a-feedback","Level":1,"Children":0,"Link":null,"Destination":null,"PostFile":null},{"CategoryType":0,"ParentID":6697,"Id":6875,"Name":"Legal","FriendlyName":"legal","Level":0,"Children":3,"Link":null,"Destination":null,"PostFile":null},{"CategoryType":0,"ParentID":6875,"Id":6876,"Name":"Privacy Policy","FriendlyName":"privacy-policy","Level":1,"Children":0,"Link":null,"Destination":null,"PostFile":null},{"CategoryType":0,"ParentID":6875,"Id":6877,"Name":"Terms of Service","FriendlyName":"terms-of-service","Level":1,"Children":0,"Link":null,"Destination":null,"PostFile":null},{"CategoryType":0,"ParentID":6875,"Id":6878,"Name":"Terms of Use","FriendlyName":"terms-of-use","Level":1,"Children":0,"Link":null,"Destination":null,"PostFile":null}]
6895
Accessing the Survey Module
-
Click on the “Survey” link on the left side of your toolbar.

Viewing the Survey List
-
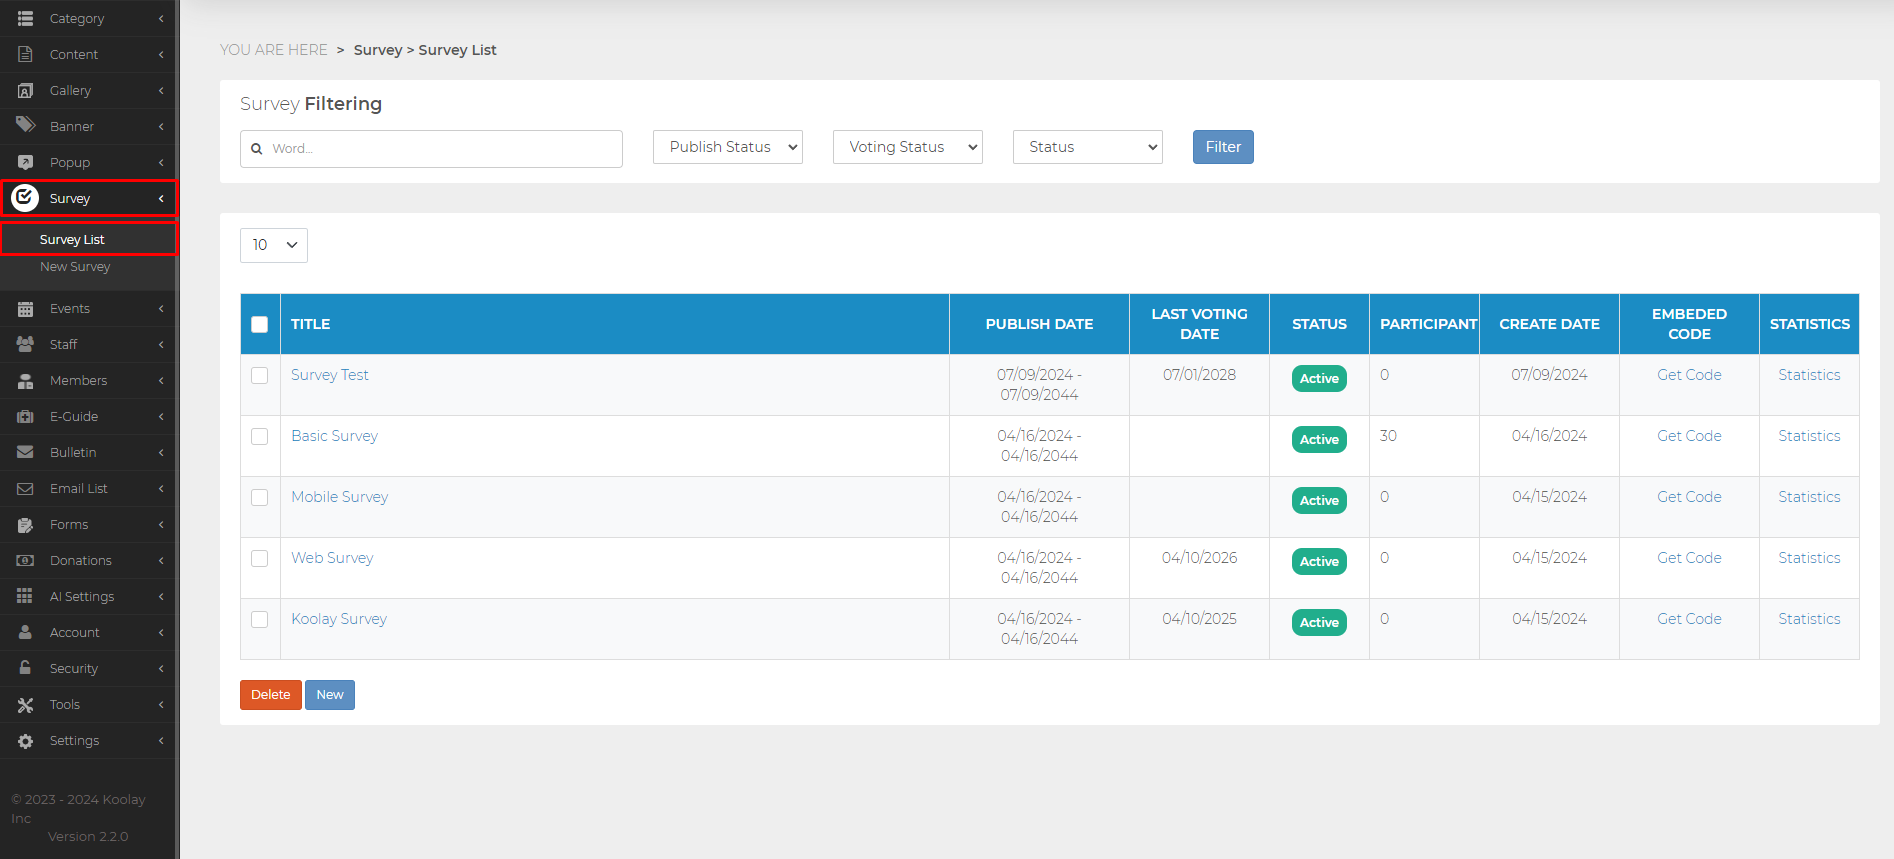
Click on the “Survey” link on the left side of your toolbar, then select the "Survey List" link.

-
View the list of surveys, including details like “Publish Date”, “Last Voting Date”, “Status”, “Participant”, “Creation Date”, and “Statistics”.

Filtering Surveys
-
Navigate to the "Survey" option on your toolbar.
-
Click on the "Survey List" link to view all available surveys.
-
Filter surveys by keywords, “Publish Status”, “Voting Status”, and “Status”.

-
Click the "Filter" button to apply your filters.
Creating a Survey
- Open the "New Survey" page under the "Survey" tab in the left menu.
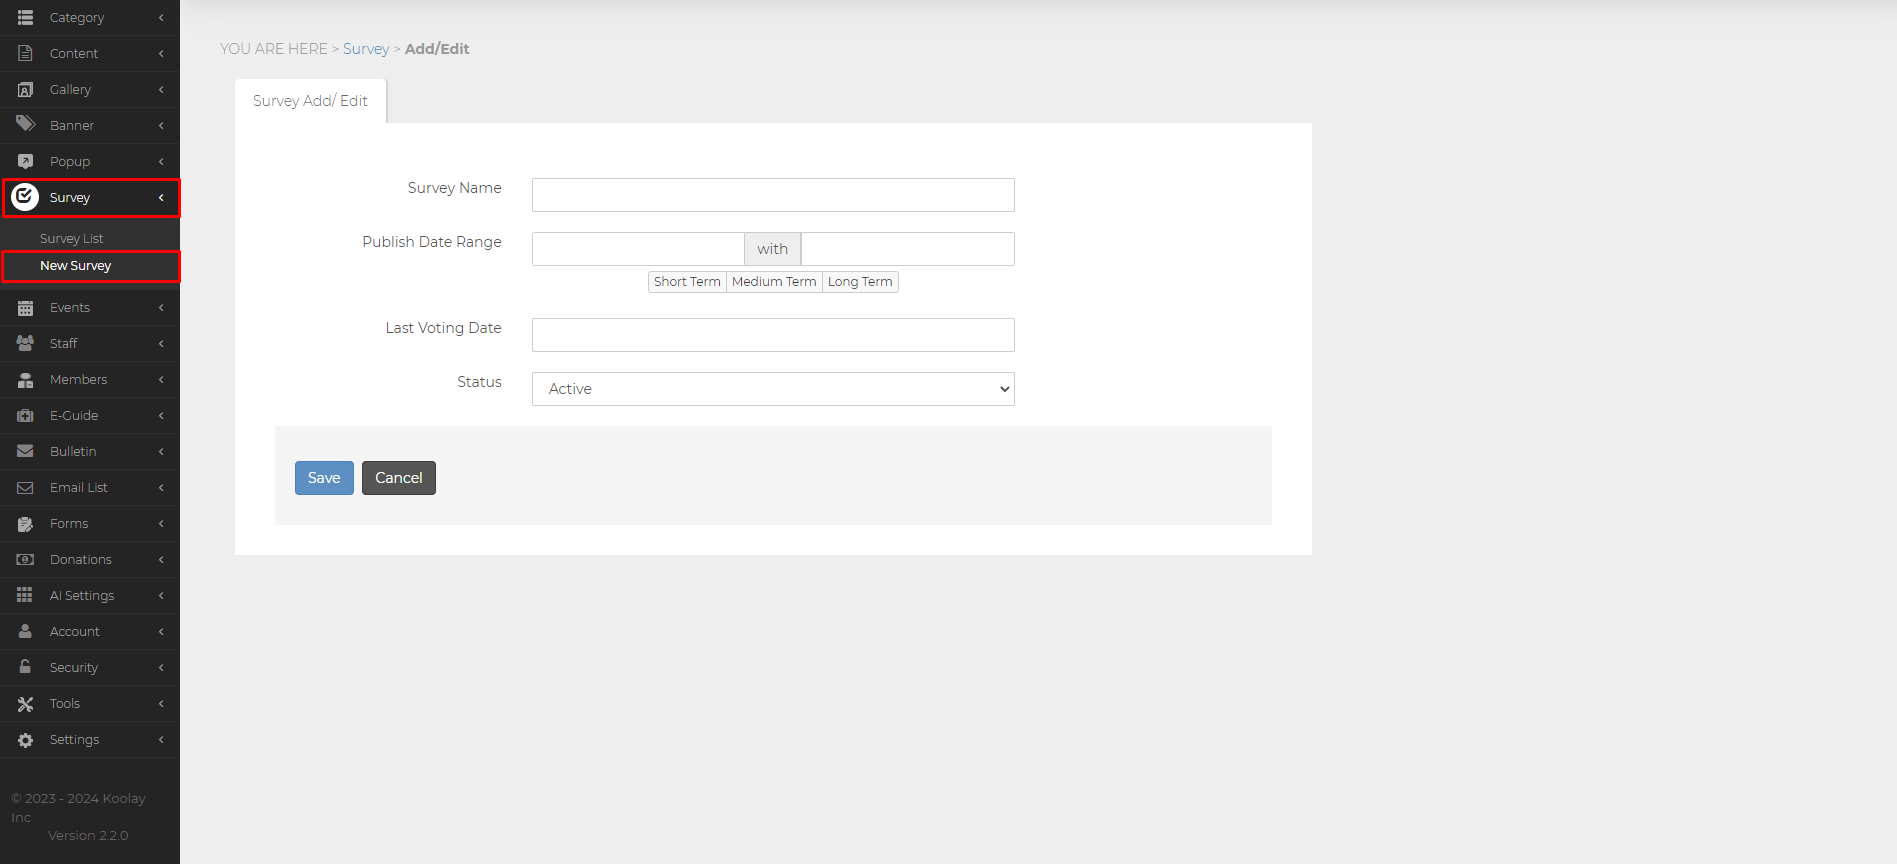
2. You can add or edit the following information from the "Survey Add/Edit" section:
Survey Name: Name (title) of the survey
Publish Date Range: Date range in which the survey will be displayed
Last Voting Date
Status: Status of the poll (Active or Inactive)
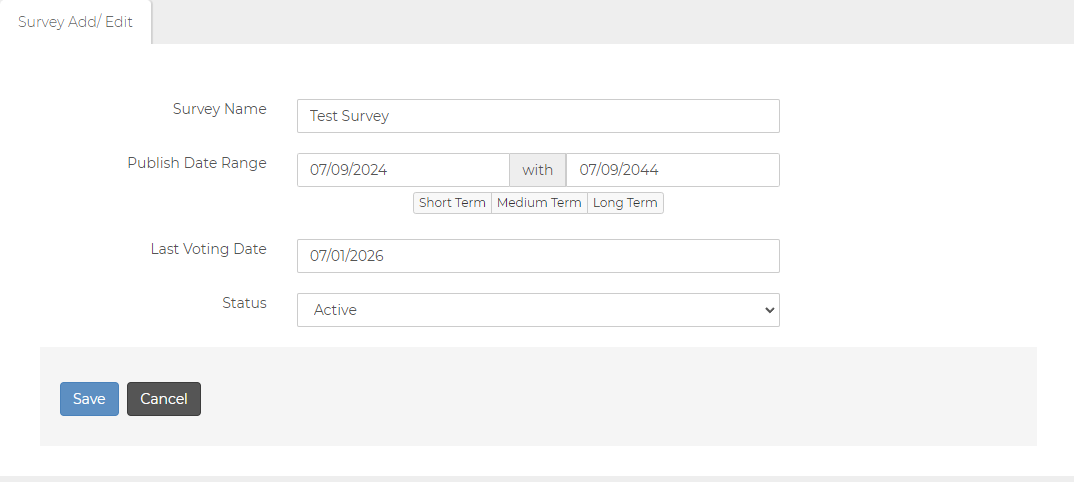
3. Press the "Save" button to save the survey.
4. Press the "Yes" button on the warning that appears and open the edit survey page.
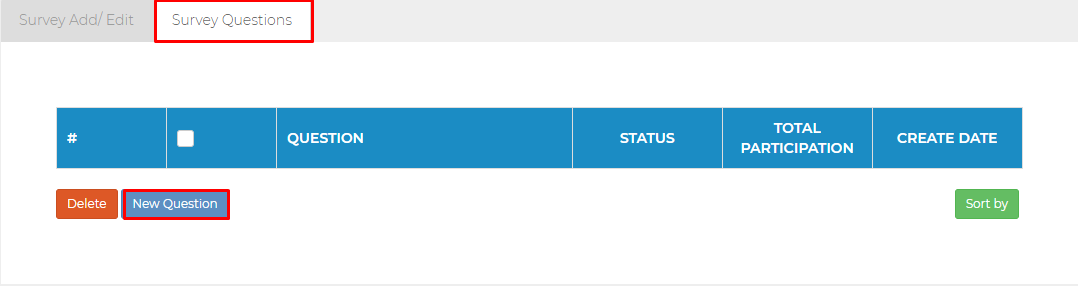
5. To add a survey question, open the "Survey Questions" page.
6. Then click on the "New Question" button.
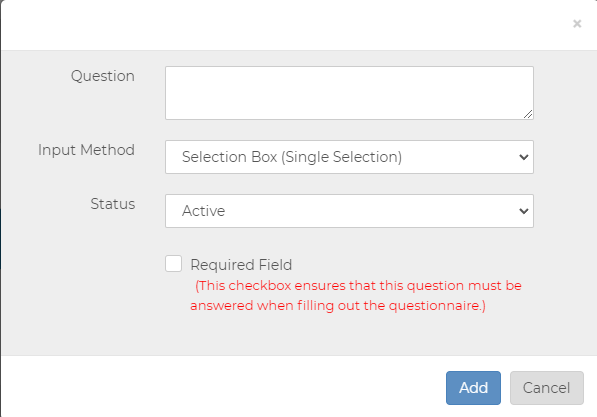
7. On the screen that opens, select the question you want to ask in the "Questioons" section.
8. In the "Input Method" section, mark the answer format of the question you are asking.
- Selection Box (Single Selection)
- Selection Box (Multiple Selection)
- Drop-down List (Single Selection)
- Free Text Input
- List Box (Multiple Selection)
9. Select the activity of the survey in the "Status" section.
10. If you want to require an answer to this question, check the "Required Field" box.
11. Finally, press the "Add" button to add the question.
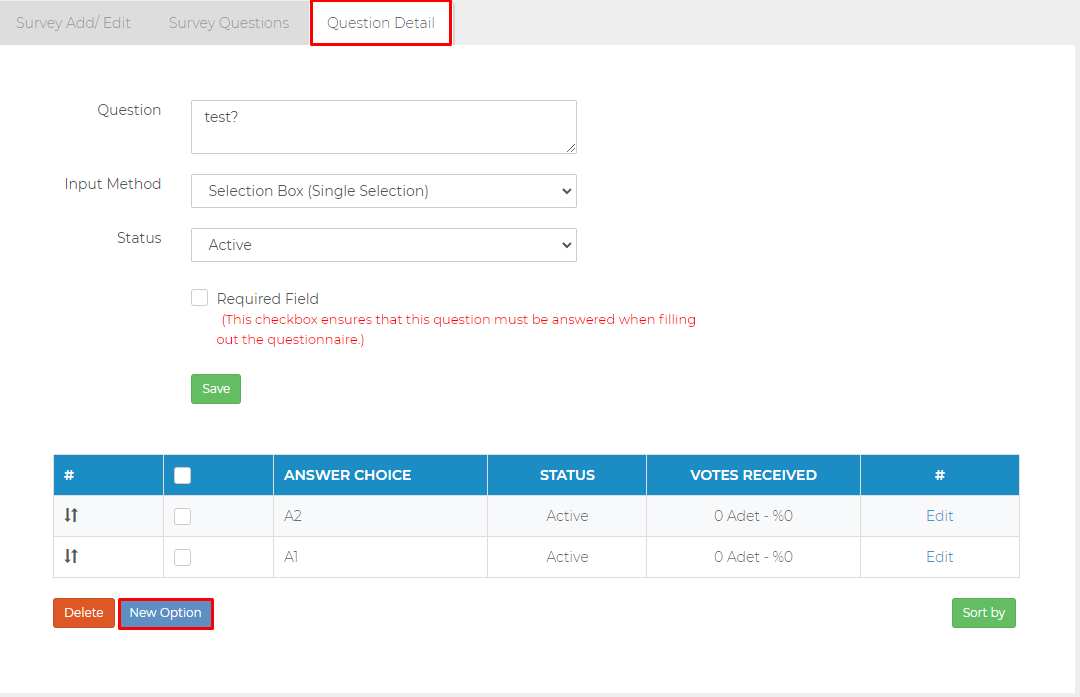
12. To edit a question, click on the question name in the question list. A page called "Question Detail" will open.
13. If you have selected an answer as a selection box, you can add a new option by clicking the "New Option" button in the list below.
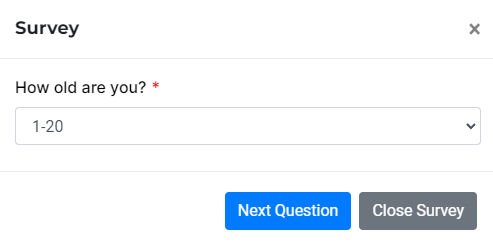
Viewing the Survey User Interface
- When you visit a website, it will show you the survey Interface available in the date range.
- It will show the questions one by one by type.
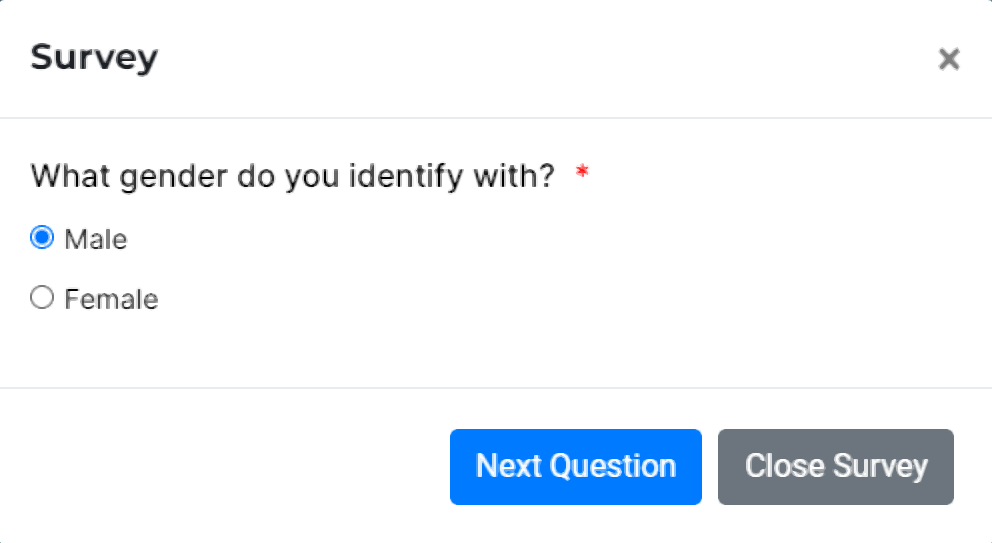

- If there is more than one survey in the date range, it will display the surveys one after the other.
- Users will be able to cancel the survey in the meantime.
Accessing and using the codes of a created questionnaire
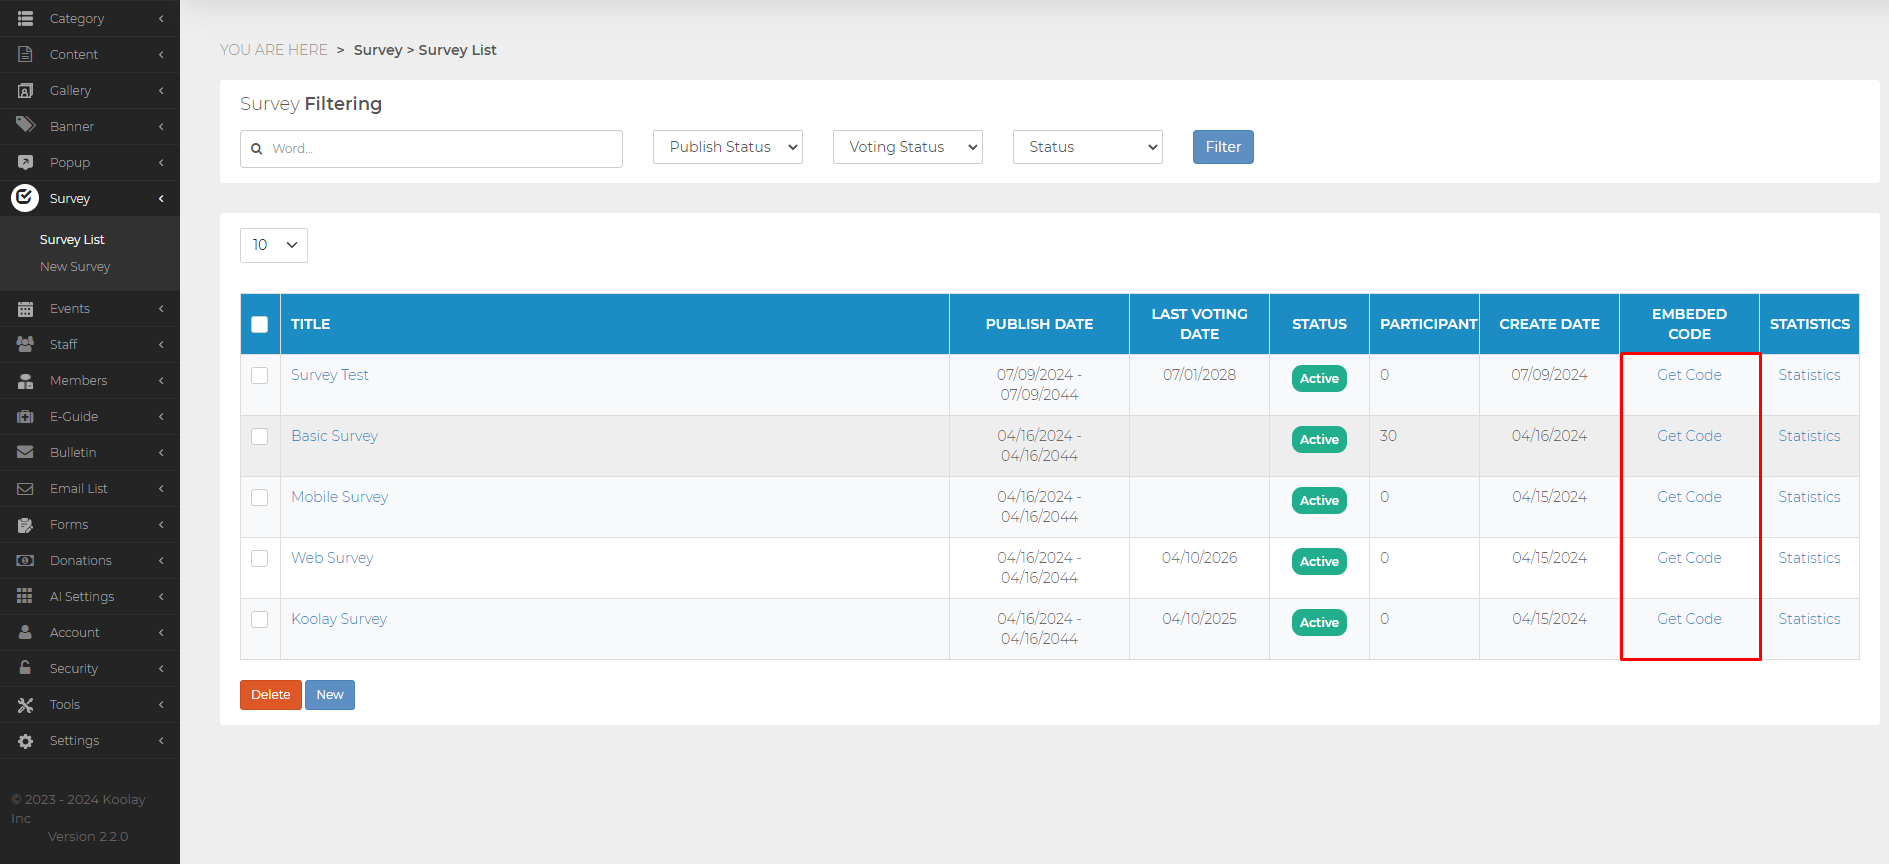
- You can also use the "Get Code" feature in surveys as in the "Form List" page. Thus, when you press the Get code button, you can copy the code that appears on the screen and add it to any line of the liquid file you want.
- Open the "Survey List" page under the "Survey" tab in the left menu.
2. Press the "Get Code" button next to the survey you want to get the code for.
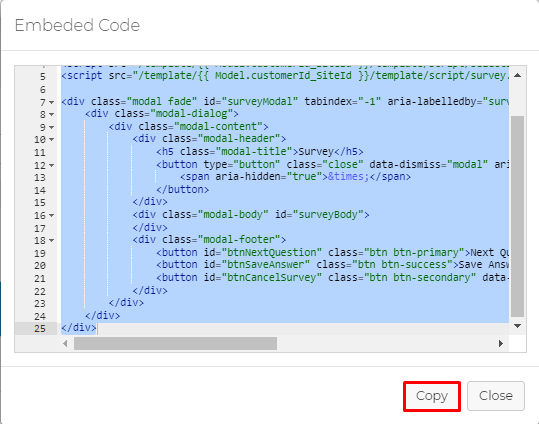
3. Copy the code in the small window that opens by pressing the "Copy" button.
4. You can either add this code to a line in a liquid file you want with the Code Editor, or you can add it using the "Source Code" button in the Content Editor.
Adding Survey Codes to a Liquid File
1. Press the "Get Code" button of the survey whose codes you want to copy.
2. Copy the code in the small window that opens by pressing the "Copy" button
3. Using the "Code Editor" feature under the "Tools" menu, open the liquid file you want to add the code to.
4. For example, let's add this survey to the footer section and open the footer.liquid file for this.
5. Find the line where you want to add the code and paste the code you copied.
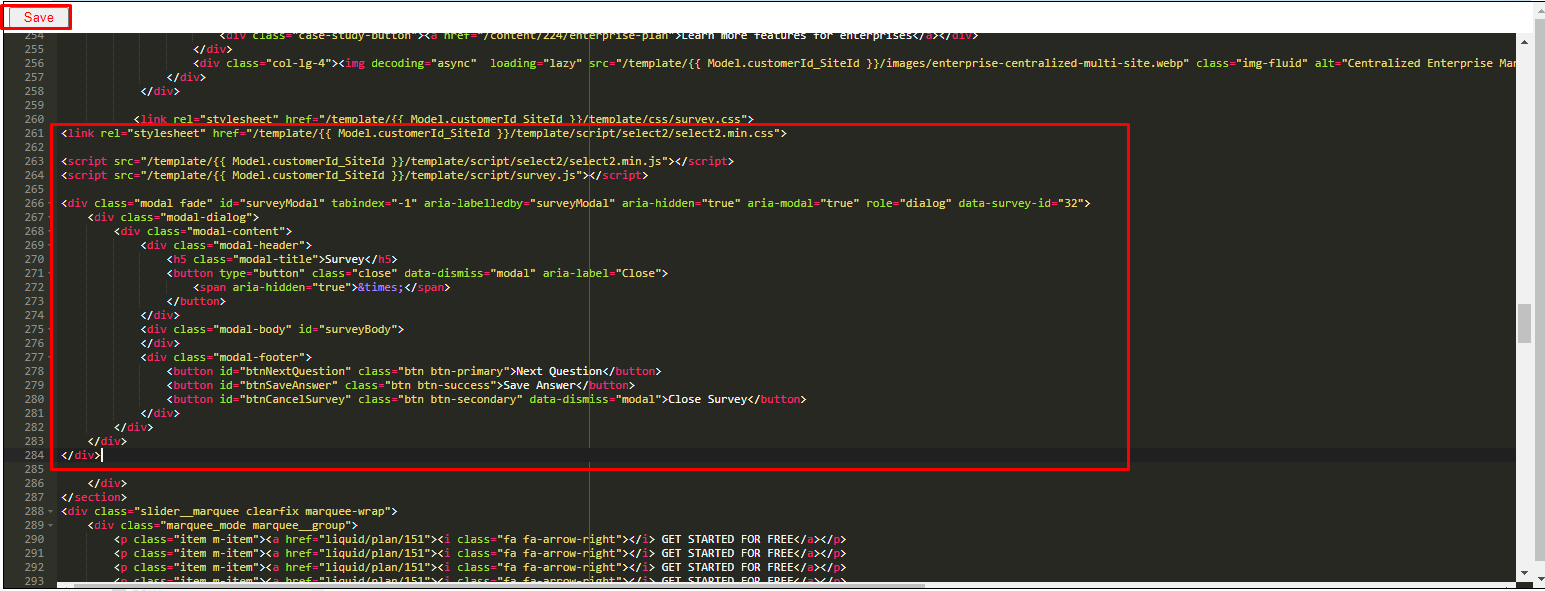
6. Finally, save the code file you opened by pressing the "Save" button on the top left.
Adding Survey Codes to a piece of content with Content Editor
1. Press the "Get Code" button of the survey whose codes you want to copy.
2. Copy the code in the small window that opens by pressing the "Copy" button
3. Open the Content Editor of the content you want to add the code from the "Content List" page under the "Content" menu.
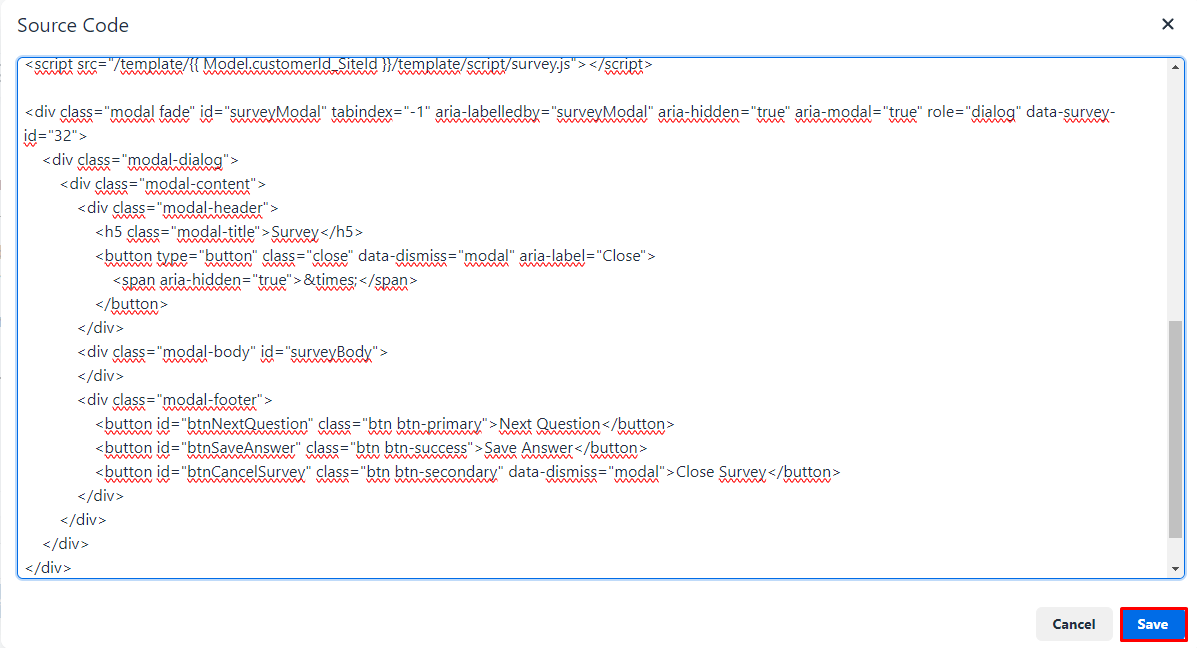
4. Access the source code of that content by clicking the "Source Code" button on the top right of the Content Editor.

5.Paste the copied code wherever you want.
6. Save it by pressing the "Save" button.
Deleting a Survey
-
Click on the "Survey” link, then on the "Survey List" link.
-
Check the box next to the survey name you wish to delete.
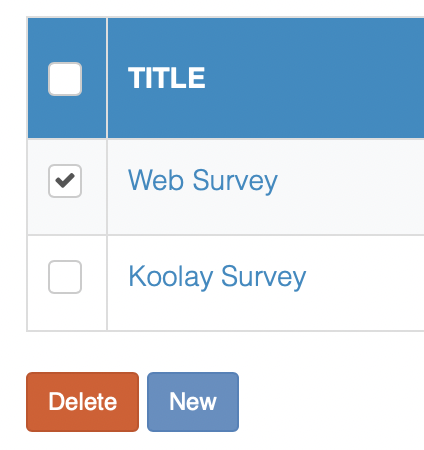
-
Click the “Delete” button.
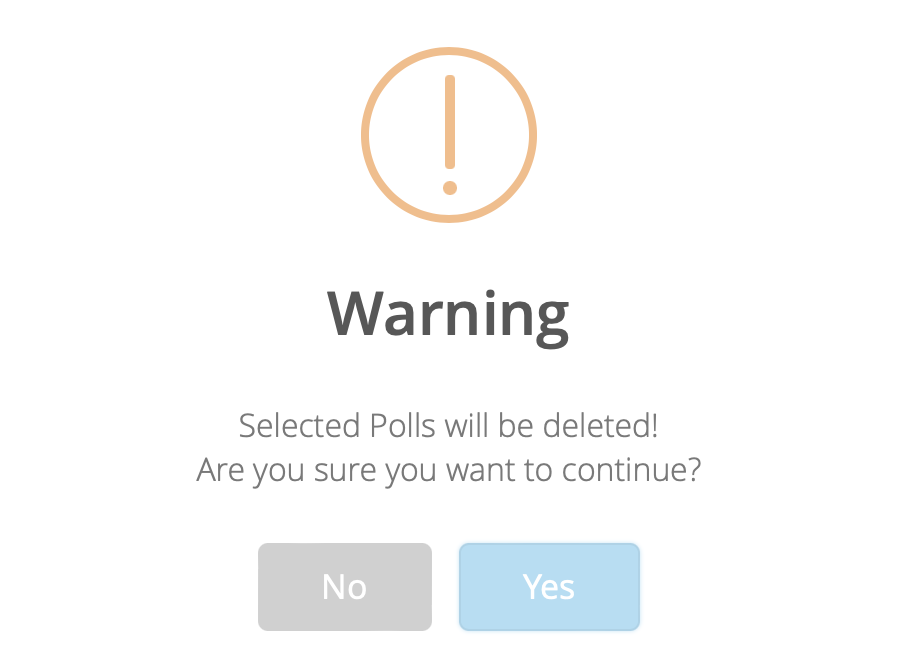
-
Confirm the deletion by clicking “Yes” when prompted.
Last updated on 2024-04-13 04:16:02Z by Koolay